Blog Entry
JBang试用以及配合Idea编辑
JBang试用以及配合Idea编辑
- Created
- 2023/09/15
- Updated
- 2024/01/03
环境
- Windows 10
- Idea 2023.2.2
❯ java -versionopenjdk version "11.0.19" 2023-04-18OpenJDK Runtime Environment GraalVM CE 22.3.2 (build 11.0.19+7-jvmci-22.3-b18)OpenJDK 64-Bit Server VM GraalVM CE 22.3.2 (build 11.0.19+7-jvmci-22.3-b18, mixed mode, sharing)
❯ jbang versionWARNING: Windows Developer Mode is not enabled on your system, this is necessaryfor JBang to be able to function correctly, see this page for more information:https://www.jbang.dev/documentation/guide/latest/usage.html#usage-on-windows0.110.1
安装JBang
scoop install jbangHelloWorld
新建
❯ jbang init Hello.java[jbang] File initialized. You can now run it with 'jbang Hello.java' or edit it using 'jbang edit --open=[editor] Hello.java' where [editor] is your editor or IDE, e.g. 'codium'. If your IDE supports JBang, you can edit the directory instead: 'jbang edit . 'Hello.java. See https://jbang.dev/ide运行
❯ jbang .\Hello.javaHello WorldCli
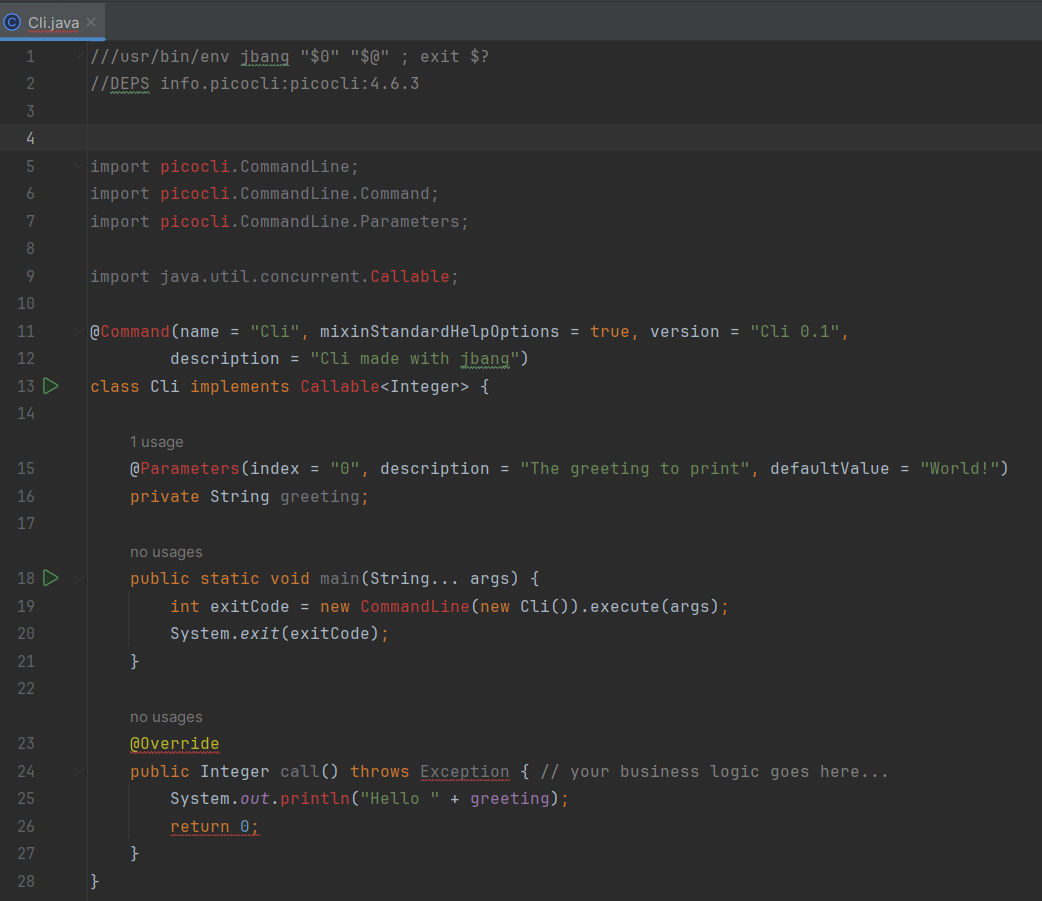
新建
❯ jbang init Cli.java[jbang] File initialized. You can now run it with 'jbang Cli.java' or edit it using 'jbang edit --open=[editor] Cli.java' where [editor] is your editor or IDE, e.g. 'idea'. If your IDE supports JBang, you can edit the directory instead: 'jbang edit . 'Cli.java. See https://jbang.dev/ide运行
❯ jbang .\Cli.java Tom[jbang] Building jar for Cli.java...Hello Tom编辑
使用Idea
❯ jbang edit --open=idea .[jbang] Assuming your editor have JBang support installed. See https://jbang.dev/ide[jbang] If you prefer to open in a sandbox run with `jbang edit -b` instead.[jbang] Starting 'idea'.If you want to make this the default, run 'jbang config set edit.open idea'打开之后发现,并没有识别出依赖的包,红彤彤的一片:
可能是插件用得不对,一顿折腾无果之后,只能另寻他路曲线救国了;
把当前目录当作一个IDEA的项目来看,添加好相关的依赖就可以:
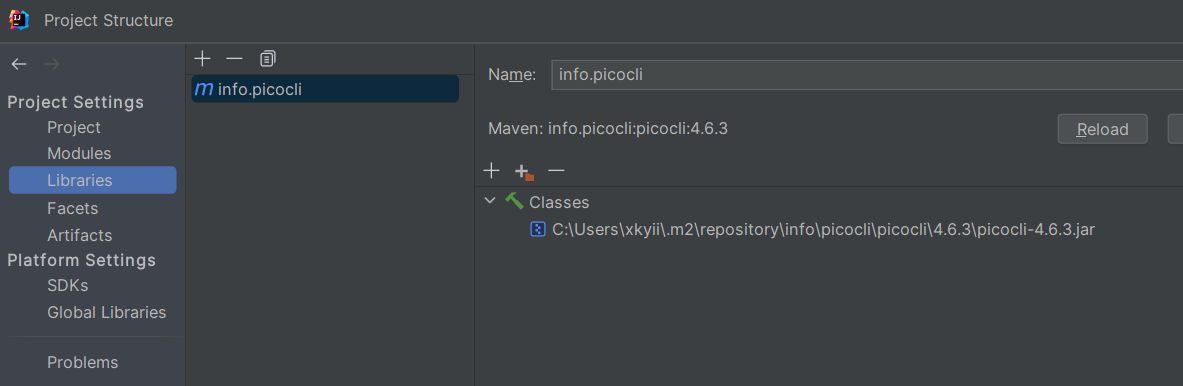
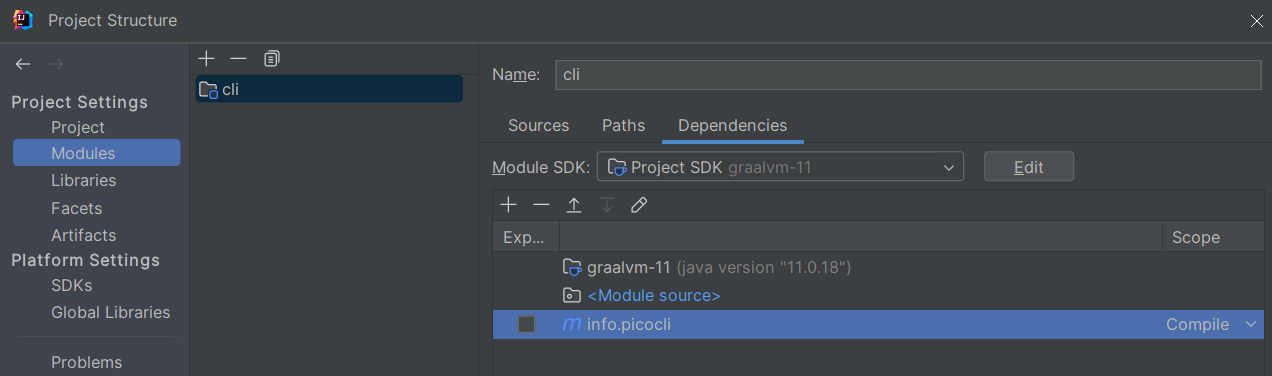
额,现在好像和一个普通的项目也没什么区别了,只是更方便运行发布而已。
proxy
参考这里配置,主要有三步
- 设置
system proxy,配置两个环境变量就可以:
# 此处用的本地clash$env:http_proxy=http://127.0.0.1:7890$env:https_proxy=http://127.0.0.1:7890- 设置
Java的JAVA_TOOL_OPTIONS环境变量:
$env:JAVA_TOOL_OPTIONS="-Dhttp.proxyHost=127.0.0.1 -Dhttp.proxyPort=7890 -Dhttps.proxyHost=127.0.0.1 -Dhttps.proxyPort=7890"- 设置
maven:
<settings xmlns="http://maven.apache.org/SETTINGS/1.0.0" xmlns:xsi="http://www.w3.org/2001/XMLSchema-instance" xsi:schemaLocation="http://maven.apache.org/SETTINGS/1.0.0 http://maven.apache.org/xsd/settings-1.0.0.xsd"> <proxies> <!-- For HTTP --> <proxy> <id>http-proxy</id> <active>true</active> <protocol>http</protocol> <host>127.0.0.1</host> <port>7890</port> </proxy> <!-- For HTTPS --> <proxy> <id>https-proxy</id> <active>true</active> <protocol>https</protocol> <host>127.0.0.1</host> <port>7890</port> </proxy> </proxies></settings>如果只是运行命令行的话,应该只需要前面两步就可以了。